Saturday, December 28, 2013

Pressed Metal Ceiling Restoration Pt 2

Has Christmas already been and gone? I feel like I barely noticed, what with everything else that's been happening. 

When last I posted, we were painting the ceilings in the kitchen with rust converter. That went well, they looked gorgeous all dark and clean. 

The grey going over the top here is metal primer...


Meanwhile, in the living room, the Peel Away paper was removed, leaving behind sludgy, softened paint, which had to be removed with a high pressure hose to get all the last paint and stripper off.

It was a messy business. 


We used a wet/dry vac to quickly clean up the water, then pulled up all the plastic sheets and mopped and dried the floors off.


Then, after the ceilings had all dried off, the primer was painted down to the white end here, which is old paint but in really good condition.


Phew. 

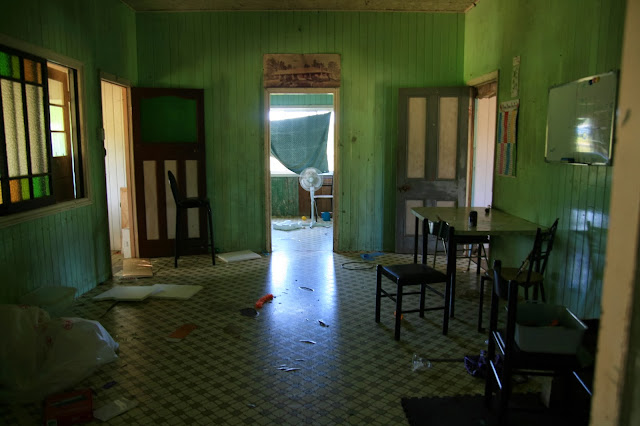
Still with me? Next up, we started sanding the walls. What an AWFUL job that has been. It's been stinking hot, the paint is stubborn as hell, and we've had to wear full cover suits and breathing masks. 

I look irritatingly happy here. That's because I hadn't started work yet. 


It's sticky, dirty work, but rewarding as the old layers of paint come away.


In many rooms, we've discovered the best way to remove the last layer of crumbly acrylic paint is with a paint scraper.

It's painfully slow, but it's been far more effective than either of the sanders we've used, one of which is so delicate it does almost nothing here and the other of which is so aggressive it leaves big gouges in the timber.

We also tried a heat gun, but all it did was turn the paint to mush.

So, for now, it's the scraper.


This is about two hours work.


In many areas, we've just sanded out the rough patches and left the rest. We've bought a special primer designed to work over painted surfaces. But, in areas like this bedroom where the paint is literally crumbling off the wall, there's no choice but to remove it all.

If you're in the Lockyer area, own a paint scraper and are at a loose end over the next few days, please feel free to come our way.

We'd be so happy to see you.

Sunday, December 22, 2013

Peel Away on pressed metal ceilings

Yesterday afternoon, work started (again) on the ceilings. The main job of the day was applying the stripper product - Peel Away 8 - to the section of the ceilings we still need to remove paint from.

Basically, you roller the product onto the ceiling and then stick sheets of paper on it. The stripper has to sit for a couple of days and then you pull the paper away and - in an ideal world - the old paint will come with it. 

It's meant to be a safe and easy way to remove lead paint in particular, but I think 'easy' is a relative term when it comes to these nasty jobs. 


Last time we did this, in the kitchen area, we used the paper in the large sheets you buy it in. Unfortunately, they were too heavy and wouldn't stick to the roof. 

We emailed the manufacturer and they recommended ripping the paper into small sheets, which has worked so much better. 


So, the middle section of the ceiling is now sitting in its chemical bath until tomorrow, and Dan has started work back down in the kitchen end.

He's using a wire brush on his drill to get off the last stubborn flakes of paint, then applying a rust converter...


...which is turning the kitchen ceiling from a dingy rusty mess into a dark, slick metal ceiling again. 


What a relief...

Friday, December 20, 2013

The Demise of the One Hour Rule

Last Summer, I had a 'one-hour' rule. 

Basically, I spent an hour a day working outside in the garden trying to get and keep things under control. Usually, I did this while Lucinda napped, which meant it was the absolute peak of the day and it was HOT. 

A friend of mine recently posted this photo he took on Facebook. It's Lucinda and I, a few weeks after arriving here. All I see are weeds and myself looking absolutely knackered. And my gorgeous daughter, of course.


Thankfully, this year, Lucinda does some daycare, we have a gardener who comes regularly to help out and the place is much, MUCH more under control than it was then. 

The one-hour rule served its purpose, but I'm glad not to have to reinstate it this Summer. 

This garden bed has been a big experiment over the last year. I've planted a lot of things I've found down at the street markets and not everything has thrived. It gets a lot of shade as it's right under the big tree in our front garden. (In the photo above, you can see the same area before we put the flower bed there - it's just weeds and old irrigation pipe).


I'm just going crazy with geraniums in here now, and some succulent flowering ground covers.

I've planted loads of pink red and now white geraniums through that empty patch there. With a bit of patience, we'll see some results in a year or so.


In other news, I was walking with Lucinda out in the paddock to 'her' pony, and we spotted this python. S/He was hard to miss. (These guys are not venomous, for those who are not aware)


They do have the most beautiful markings, though. 

Sunday, December 15, 2013

Cabinet Handles

The cabinetmaker who fitted our kitchen returned this morning to fit the handles too. 

I can hardly wait to start filling those glass-fronted cabinets up with colourful bowls and bits and pieces, but I suppose I better wait until we've sanded and painted first...


We're gearing up now for that job by checking which areas are definitely lead paint. Pretty much all of them, in case you were wondering.


Lead paint = expensive protective gear. Our masks and the gas cannisters to go with them have cost about $800 (gulp). Plus there's coveralls and various other bits and pieces still to buy. At this rate, getting rid of the lead paint safely is going to cost almost as much as getting rid of the asbestos (the professionals did that) and take a lot more of our time.


We're not excited about wearing these masks for a week right in the middle of Summer. 


Dan has already made the relevant 'Lu, I am your Father' jokes, by the way. Lu is not a fan of these masks whatsoever. She describes them as 'bery scawy', which is also what she says about Santa Claus. 

Tis the season to scare your toddler, evidently.

Friday, December 13, 2013

On Leaving The City

Over the last year, Dan and I have had a lot of people ask us whether we miss Brisbane. Both of us have been a little confused by the question.

The thing is - we don't have to miss Brisbane. The CBD is an hour from our front door (that highway is FANTASTIC, by the way). 

We go in often, for all sorts of reasons. I've had many days where I've woken up, desperately craved a coffee and chat with an old friend, and driven in just for that.

But, while there's a lot about Brisbane I really love, I'm always so happy to come back here after. We feel like we get the best of both worlds now. 

So, no. We don't have regrets about moving out of town. We wish our place had been in better condition when we stumbled upon it and our task here had been a little less taxing, perhaps. 

But we still don't regret buying it, because we love its location and we love its potential. I don't think either of us has ever really lost faith in the vision for any great length of time, despite the hard days. In fact, the more energy and elbow grease we've sunk in, the more we've both been heartened by the results. I think it's the vision that's got us through.

After all, it's hard to stay mad with a lifestyle that so clearly gives your child so much.


Our hope is that, some time early next year, we can move into our almost-renovated Queenslander, the hard yards behind us, and actually relax and enjoy it.

Then, we'll know for sure it's all been worthwhile.

Tuesday, December 10, 2013

A Year In - Then and Now

It's finally time to show some of the fruits of a year's worth of blood, sweat and tears.

As you'll see, we have come a long way - but still have a long road ahead.

Again, for Little House interior before and afters, click here or here.

So, starting off with perhaps our least impressive progress, Little House from the exterior.

Then...


And now...


And Little House's garden, now.


Big House Exterior Then:


And now:


Big House lounge and dining room:


And now. It's not easy to tell but the photo above was taken from the doorway... of a wall that is no longer there (it stood where the floorboards change colour, below). 


Big house kitchen then:


And now:


Big House pantry then.


And now...


The yards then...


Still then...


And now...


Then:


Now:


It's taken a whole lot of work to get as far as we've come, but the hard yards are just beginning. Thanks to everyone who's come along on this journey with us over the last year, your advice and support has helped us get through the tough days. 

Sunday, December 8, 2013

What We've Got Planned For Christmas

I decided to do this in video form to give you a better idea of what we're tackling over the next month or so...

Saturday, December 7, 2013

Sodablasting Pressed Metal Ceilings

I recently had an email from a reader, Bridget, sharing some photos of the restoration of the pressed metal ceilings in her Queenslander and I've just fallen in love with them.


The ceilings come complete with a cornice and are in fantastic condition (they possibly didn't sit under a leaky roof for years). They're also done in the most beautiful patterns.

Bridget introduced me to the idea of sodablasting, which is how they had their ceilings stripped ready for painting. It's similar to sandblasting but uses bicarb of soda. Neither Dan or I had ever heard of it before. 


We'd love to try the soda blasting on our ceilings and I rang a few providers to get some insights. Unfortunately, because ours are painted in lead paint, I was advised it wasn't an ideal approach as it would spread the lead dust everywhere. The costs were also high and I couldn't find anyone willing to take the job on over Christmas, which is when we need it done.  

So, we're back to Plan A for now.

You may remember we initially did the Kitchen Ceiling with Peel Away and, while it was time consuming, we think that's the way we'll go again in the rest of the ceilings.

It does involve bringing water inside - Dan had to use a high pressure hose last time to get it all off. That wasn't ideal then and it's even less so now that the floors are polished.

So, Dan's planning to build a bund wall out of framing and a large membrane to contain the mess as best as possible. I'll be standing by with the wet dry vac to try and keep on top of it too. Luckily, none of the area is wired yet making this approach possible (although not ideal).

For the lack of a better option though, we'll have to make it work!